 English
 русский
 Español

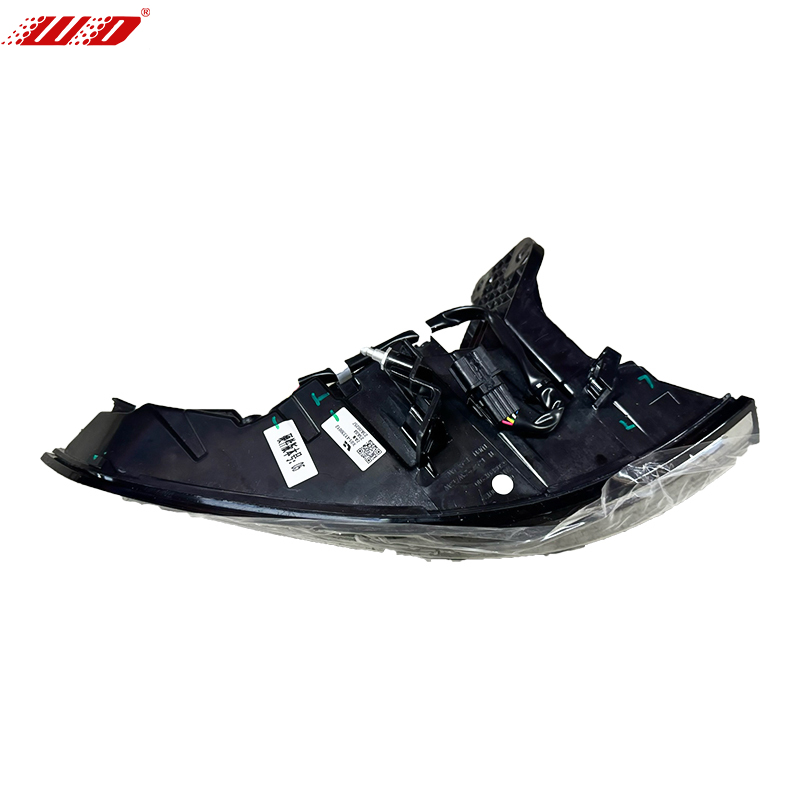
Two left headlamps for the same Li Auto L7 can carry different part numbers, different connector keys and different beam patterns. One is the high-grade lamp, the other is the new-model high-grade lamp, and neither will simply drop into the other's wiring. Ordering a headlight by model name alone is how a workshop ends up with a lamp that fits the body but refuses to light up.
The practical rule is simple: buy car headlight parts by part number, by side, and by configuration level, then verify the connector, the leveling motor and the breather vent before payment clears. Everything below explains why that sequence matters, which internal parts fail first, and how a small tolerance difference turns into a comeback job three weeks later.
Content
- 1 Inside a Headlight Assembly: Which Parts Actually Fail
- 2 Part Number, Side and Configuration: Three Filters Before You Pay
- 3 The Hidden Cost Indicators Behind a Cheap Headlamp
- 4 Where Headlight Demand Comes From
- 5 A Sourcing Workflow That Survives a Workshop Audit
- 6 Installation, Sealing and Compliance Notes
Inside a Headlight Assembly: Which Parts Actually Fail
A modern lamp is a sealed optical instrument, not a bulb behind glass. Its parts fail at different rates, and only some of them are sold separately. Knowing which is which prevents paying assembly money for a five-dollar fault.
Polycarbonate with a hard coat and UV stabiliser. Crazing, stone chips and yellowing start here, and a compromised coating accelerates the haze.
Glass-filled polymer back shell joined to the lens with butyl or hot-melt adhesive. The joint, not the plastic, is the usual leak path.
Metallised surfaces and the shield that produces the low-beam cut-off. A bent shield or contaminated surface throws the beam pattern off aim.
The light source plus the electronics module that regulates current. Heat and moisture kill drivers long before the LEDs themselves degrade.
Acrylic pipes that distribute daytime running light. A single cracked guide turns the whole signature strip into a dull yellow band.
An ePTFE membrane equalises pressure, the leveling motor aims the beam, and the mounting tabs carry crash energy. These are the parts sold separately most often.
On most Chinese EV platforms, the LED board and driver are not offered as field-serviceable items. That is why assembly-level replacement dominates collision repair, while brackets, vents, pigtails and leveling motors stay in the parts catalogue. If your fault is condensation rather than a dead beam, replacing the whole lamp without fixing the vent or the seal simply resets the clock.
Part Number, Side and Configuration: Three Filters Before You Pay
Three attributes separate a good lamp from a return: the exact part number, the left or right position, and the trim level it was built for. Ignore any one of them and fitment becomes a coin toss.
- Part number. A number that decodes to the correct platform and build period is the only reliable match. Model-year ranges overlap constantly, so a 2022 catalogue entry can be wrong for a car registered in mid-2023.
- Side. Left and right lamps are mirror images with mirrored optics. They are never interchangeable, even when the housings look symmetrical in a photo.
- Configuration. High-grade and low-grade lamps differ in matrix function, connector pin count and sometimes the bracket. A high-grade lamp fed by a low-grade harness may physically mount but throw a fault code.
Indicative comparison of the three supply routes; actual figures depend on the platform, the vendor's testing protocol and the export market's certification requirements.
The terminology itself causes confusion, so it is worth reading a short breakdown of OEM and OE parts differences before negotiating price. A lamp labelled "genuine" by a reseller is not automatically a factory-line part, and an OE-equivalent unit from a serious supplier can outperform a grey-market original.
 Li Auto L6 High-Configuration Left and Right HeadlightsThese separate left and right high-configuration headlamp assemblies suit the L6 and help clarify mirrored optics and part-number distinctions before price negotiation.View Product →
Take the Li Auto L6 as a case in point: the left high-configuration headlamp and its right-hand counterpart are listed under separate part numbers because the internal optics are mirrored, and the high-configuration specification adds functions the base lamp does not carry.
The Hidden Cost Indicators Behind a Cheap Headlamp
Purchase price is the smallest number in the equation. What actually drives cost is the rate at which a given part comes back, and the reasons are remarkably consistent across workshops.
connector
ingress
guide
out
damage
Distribution of headlamp-related warranty and return reasons, based on typical after-sales patterns reported for imported Chinese-brand assemblies.
The first bar is the expensive one, because it is invisible until installation. A configuration mismatch burns labour hours twice: once to fit, once to remove. Moisture ingress is second and usually self-inflicted, since many "wet" lamps were fine until a body shop resealed a lamp with the wrong adhesive or left the breather membrane clogged with paint overspray.
Two more indicators deserve a place in your evaluation. First, whether the seller publishes the part number on the listing itself rather than only in a photo of the sticker. Second, whether the lamp ships with a protected connector stub; a bare connector collecting dust in transit is a future intermittent fault.
Where Headlight Demand Comes From
Demand is not evenly spread across reasons to buy, and that shape should influence what you stock.
Approximate split of headlight component purchases by trigger event across body shops, dealers and independent repairers.
Collision work dominates because front corners take the first impact. That is also why brackets, mounting tabs and grille-adjacent trim sell alongside lamps rather than months later. The ageing segment is where electrical diagnostics pay: a flickering daytime running light on a Leapmotor or a ZEEKR usually points at the driver or a light-guide crack rather than the LEDs, and misdiagnosing it leads to an unnecessary full assembly order.
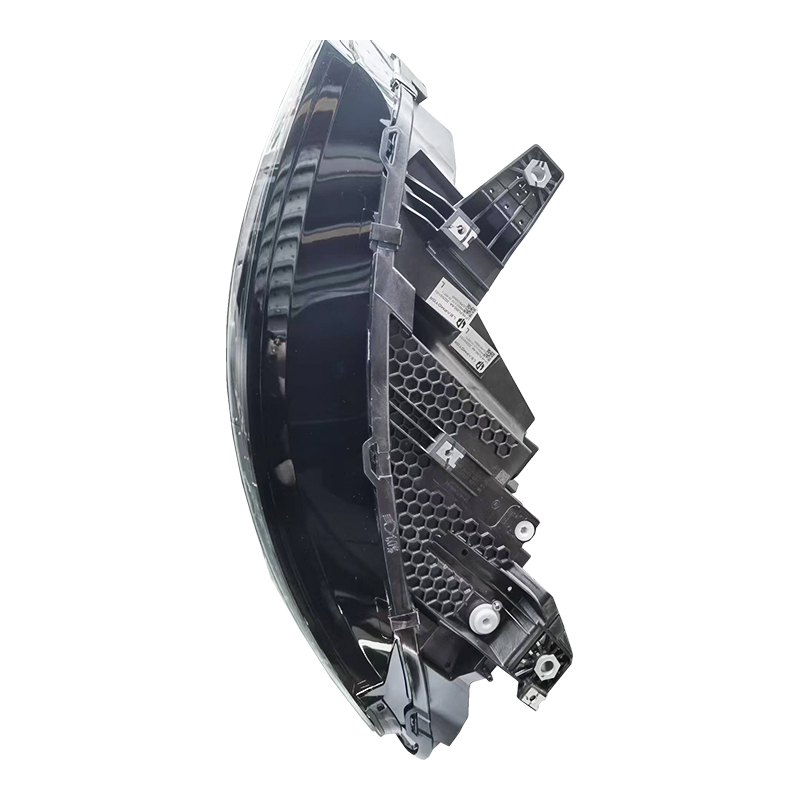 Leapmotor C10/C16 Left OEM LED HeadlampThis left OEM LED headlamp for 2024 Leapmotor C10/C16 offers factory fitment and durable construction, relevant when collision damage or DRL diagnostics require assembly replacement.View Product →
Left-hand lamps move faster than right in right-hand-traffic markets for a simple reason: kerbside impacts and parking damage concentrate on the driver's side in left-hand-drive vehicles and on the passenger side in right-hand-drive ones. Stock parity, not symmetry, is the right planning assumption.
A Sourcing Workflow That Survives a Workshop Audit
Five checks, done in this order, remove almost every avoidable return.
Confirm build date and trim, not just model year. A late-cycle car often belongs to the next catalogue group.
Write the part number on the job card and cross-check the left or right suffix before the order is released.
Pin count, connector keying, leveling motor presence and bracket shape decide whether the lamp is truly plug-and-play.
Look for a continuous adhesive bead, an intact vent membrane and no solvent residue on the lens coating.
Foam cradles, corner protection and a sealed connector bag. Cosmetic damage in transit is a claimed defect you cannot resell.
 Zeekr 009 OEM Headlight Assembly 8889335759/8889335761OEM headlight assembly for Zeekr 009, identified by part numbers 8889335759 and 8889335761, supports fitment checks and grouped platform orders with related brackets and harnesses.View Product →
For multi-model buyers, grouping orders by platform reduces risk: a mixed pallet of ZEEKR 009 headlamps, related brackets and harness pigtails is easier to inspect and cheaper to ship than the same value spread across five shipments. It also makes part-number discrepancies obvious at goods-in rather than at the vehicle.
Where a full electrical system listing exists for a platform, use it to confirm that the lamp you are buying belongs to the same generation as the modules around it — the Li Auto L7 electrical system parts section illustrates how cameras, radars and lamps sit together in one catalogue tier.
Installation, Sealing and Compliance Notes
Fitting discipline decides whether a correct part performs correctly. Aim the beam after installation with a proper beam setter; a lamp that looks right on the wall can still glare oncoming traffic and fail inspection. Torque mounting fasteners to specification rather than by feel, since over-tightening distorts the housing and opens the seal joint.
- Never wipe the cover lens with solvents or aggressive degreasers; the hard coat is thin and irreversible once dulled.
- Keep the breather membrane clean and unpainted. It regulates pressure and is the main defence against condensation.
- Replace a damaged bracket rather than bending it back; a distorted mount changes beam geometry permanently.
- Store assemblies upright in their cradles, away from direct sun and below roughly 40°C, to protect the adhesive bead.
- Check the certification markings for your market before shipping — ECE regulation markings for Europe, DOT markings for the United States.
Compliance is a purchasing issue, not just an engineering one. A lamp that meets the road-lighting standard in one market may be non-compliant in another because of beam pattern, colour temperature or the absence of a mandatory marking. Confirm the destination market's requirement at the quotation stage, keep the batch documentation with the shipment, and you turn a potential seizure into a routine delivery.
Get the part number, the side and the configuration right, inspect the seal before installation, and most headlight complaints disappear before they reach a warranty claim.