 English
 русский
 Español
A 2024 Li Auto L7 arrives at the body shop with front-left collision damage. Before touching the quote template, the estimator opens the bumper parts diagram — and for good reason: "front bumper" on an invoice is not a part name. The diagram splits that one phrase into a painted cover, an EPP energy absorber, a reinforcement beam, left and right mounting brackets, a lower grille, and a radar bracket. Each layer carries its own part number, its own price, and its own delivery timeline.
Because the cost spread between a $90 cover and a $400 beam changes the estimate completely, reading the diagram directly is a cost-control skill for the workshop and a trust signal for the customer. Get the left/right position or trim grade wrong, and the parts counter becomes the bottleneck.
Key takeaway: a modern bumper is a multi-layer impact system. Reading its parts diagram correctly — including model year, trim grade, and left/right position — decides whether you order one component or seven, and whether the vehicle leaves the shop in one day or one week.
Content
- 1 Anatomy of a Bumper: What the Parts Diagram Is Really Showing You
- 2 Component-by-Component Comparison: Front vs Rear Bumper Layers
- 3 Hidden Metrics: Where Impact Energy Actually Goes
- 4 Where Bumper Parts Demand Comes From in the NEV Market
- 5 How to Read a Bumper Parts Diagram and Order the Correct Parts
- 6 Repair Limits, ADAS Compliance, and Documentation
Anatomy of a Bumper: What the Parts Diagram Is Really Showing You
A bumper parts diagram is an exploded view of the front or rear fascia system, stacked from the outside in. On the Chinese-built new-energy vehicles that make up most of this catalogue — Li Auto, ZEEKR, VOYAH, Leapmotor, and Geely — the layering is consistent. Learn the sequence once and you can read any of their diagrams.
Bumper Cover (Fascia)
The painted outer skin, normally PP/EPDM or ABS blends. It carries the styling, the airflow openings, and the mounting points for cameras, ultrasonic sensors, and, on a rear bumper, the charge-port bezel.
Energy Absorber
A foam (EPP or PU) or honeycomb plastic block behind the cover. It is the first layer that crushes, protecting the reinforcement beam from parking-speed impacts.
Reinforcement Beam
A steel or aluminium profile bolted to the body structure. It spreads collision load across both chassis rails instead of leaving a single concentrated contact point.
Crash Boxes & Brackets
The sacrificial connectors between the beam and the frame. They fold in a controlled pattern so the repair replaces a bracket rather than cutting frame rails.
Grille, Fog Frames & Trim
Cooling intake, active shutters, air curtains, camera covers and decorative strips. These are densely populated on EVs and are frequently damaged even when the structure is intact.
Sensor Brackets & Wiring
Radar, camera and parking-sensor mounts with alignment tabs. Broken tabs force full ADAS recalibration once the new cover goes on.
Rear bumper diagrams follow the same logic but add a tail-light recess, a licence-plate pocket, and, on many EVs, the charge-port bezel. Suppliers that catalogue by original part numbers save you the guesswork: partslz, for instance, lists the Li Auto L6 front bumper under its factory designation LAA28030032 rather than a loose "front bumper" category.
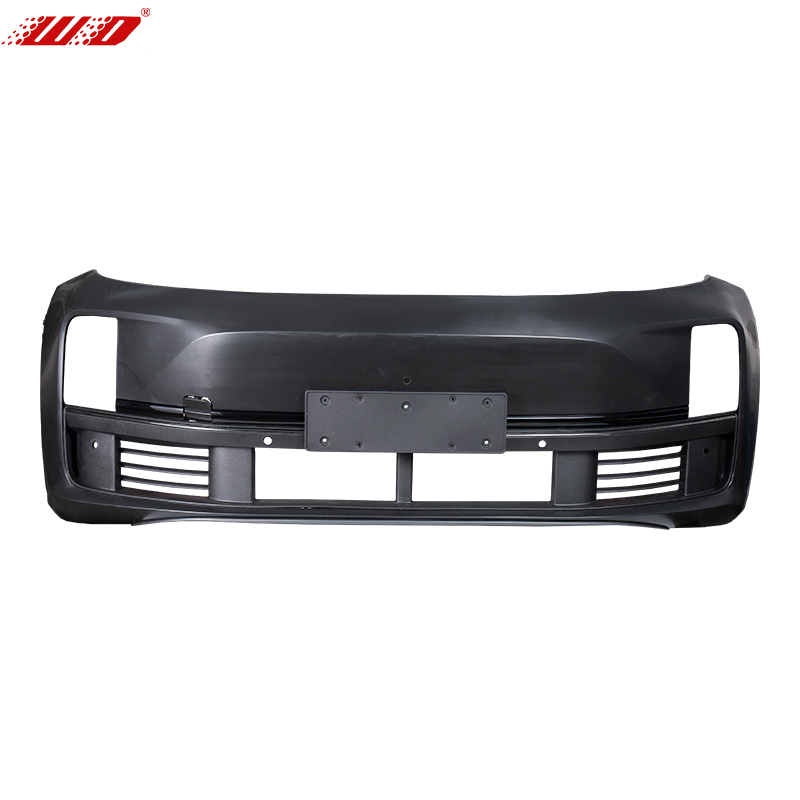 Li Auto L6 Front Bumper with OEM Part Number LAA28030032This front bumper is catalogued under its factory designation, which helps you confirm fitment without guessing. It suits buyers sourcing replacement parts for the Li Auto L6.View Product →
Component-by-Component Comparison: Front vs Rear Bumper Layers
The diagram becomes useful only when you know what each layer does and when it needs replacement. The six layers below appear on nearly every front or rear bumper in the current new-energy market.
Hidden Metrics: Where Impact Energy Actually Goes
The engineering behaviour hidden inside a bumper is easier to visualise with numbers. In a 16 km/h front barrier impact that does not deploy the airbags, the assembly absorbs energy in roughly this distribution:
Two practical conclusions follow. First, a cover that looks untouched can hide a crushed absorber and a folded crash box; inspect all layers before declaring a bumper reusable. Second, the beam does almost half the work — which is why bending it once should retire it permanently. The yield strength profile is never the same after the first hit, so straightening creates a hidden weak point in the next collision.
Where Bumper Parts Demand Comes From in the NEV Market
Parts demand for bumper components reaches far beyond crash repair. For the brands in this catalogue, the application split looks like this:
- Collision repair — 48%
- Cosmetic and styling upgrades — 18%
- Warranty and insurance replacement — 16%
- ADAS sensor and camera service — 10%
- Removal damage during other repairs — 8%
For a workshop, that split is a stocking hint: keep covers, grilles, fog frames, and brackets ready for the high-frequency collision and cosmetic jobs, while ordering beams and absorbers the moment a structural estimate is confirmed. The ADAS segment is growing because sensor-dense bumpers are now standard on Li Auto, ZEEKR, and Leapmotor vehicles, and every sensor service touches the bumper assembly.
How to Read a Bumper Parts Diagram and Order the Correct Parts
Ordering from a bumper parts diagram is a five-step discipline. Missing one step turns a 30-minute lookup into a week of return shipping.
A typical catalogue entry for a two-piece front bumper looks like this — note that the upper shell and lower shell are separate line items:
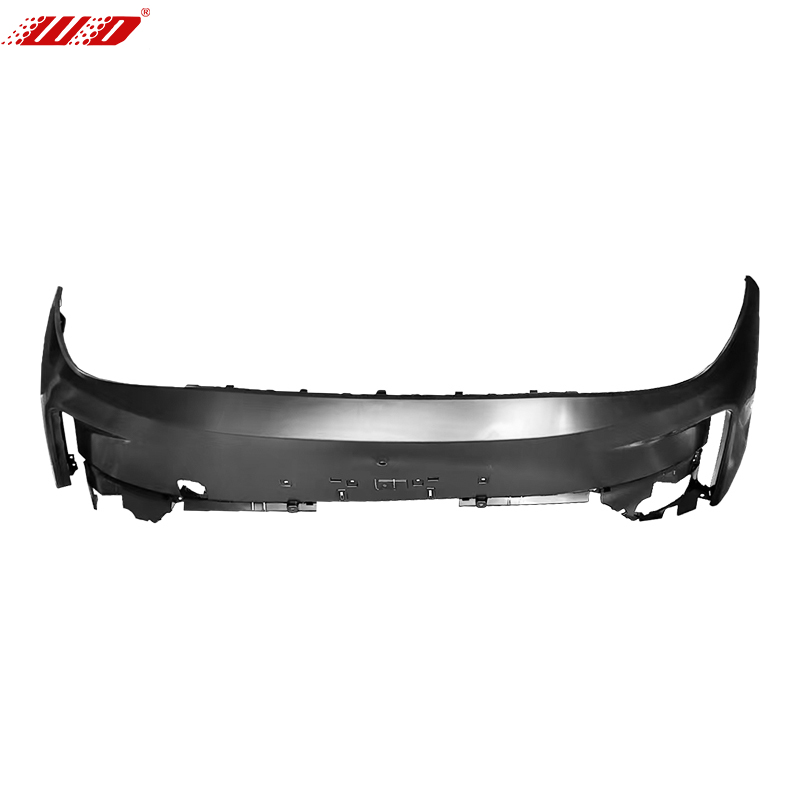 Front Bumper Upper Shell Assembly for Leapmotor C10 and C16A two-piece front bumper entry where the upper shell is a separate line item. This assembly is listed as compatible with 2021-2024 Leapmotor C10 and C16 models.View Product →
- Step 1 — Lock the VIN and build date. Model-year changes alter the diagram even when the nameplate stays the same. The ZEEKR 001 21-model and 24-model rear bumpers share the vehicle name but not the panel sections, brackets, or light recesses.
- Step 2 — Isolate the bumper system. Split exterior layers (cover, grille, trim) from structural layers (absorber, beam, crash boxes) on the diagram before calling suppliers.
- Step 3 — Check left/right and trim grade. Many bumpers are listed as left or right, high or low configuration. The high-spec Li Auto L8 headlight aperture is not the same as the low-spec one, and a wrong assumption fails at fitment.
- Step 4 — Cross-reference the original part number. Reliable suppliers list parts under OEM-style numbers, not vague descriptions. On the Geely Coolray SX11 2022 Pro, the diagram splits the front bumper into separate left (6010182100/6010182300) and right (6010182000/6010182200) pieces plus a middle section (6010182500) — three line items for one visual part.
- Step 5 — Confirm clips, foam, and brackets. Add the small line items before quoting. Clips, blind rivets, and foam blocks are rarely included in a cover-only price.
Repair Limits, ADAS Compliance, and Documentation
A bumper that leaves the shop has to survive more than a visual check. Repairability limits, ADAS calibration, and regulatory compliance are where an experienced supplier saves you from rework, liability, and warranty disputes.
Repair limits by layer
Plastic covers can be plastic-welded when the crack sits outside structural zones and above the lower mounting line. Energy absorbers should be replaced after any compressing impact; EPP foam loses most of its second-hit capacity. A bent reinforcement beam must be replaced, not straightened. If you need the full repair-versus-replacement logic, our guide to body parts after a collision walks through it in more detail.
When replacement, not repair, is the verdict, an assembled option such as the ZEEKR 007 front bumper assembly bundles the cover and the main mounting points into one part number, which shortens procurement lead time.
 ZEEKR 007 Front Bumper Assembly with Mounting PointsBundling the cover and main mounting points into one part number shortens procurement. Useful when replacement is required and you want to reduce lead time.View Product →
ADAS recalibration is not optional
On Li Auto and ZEEKR models, the front radar and camera brackets are positioned relative to the floor reference line. Removing the bumper shifts these mounts; a 2 mm angular deviation changes autonomous emergency braking timing. Skipping recalibration on OEM targets leaves a defect that the customer will discover at speed.
Pedestrian protection and material compliance
Bumper energy absorption in these markets is governed by regulations such as UN R127 or GB 24550. A generic hard cover or a modified reinforcement structure increases pedestrian leg-injury risk and can void insurance coverage in a claim. Specifying original-grade PP/EPDM preserves cold-weather flexibility; budget alternatives turn brittle near -10°C.
Documentation and sourcing
Record the OEM part number, batch photos, and the layer-by-layer line items on every invoice. Insurance audits and customer warranty claims both depend on this paperwork to prove the structure meets the original specification. It also speeds up future sourcing — and when you do need a new supplier, knowing how to choose reliable auto parts prevents most of the quality surprises we see in the market.